General
Using customizable linkers allows create relations according to individual requirements. This is mainly used in order to cross-link data and assets that come from multiple – hitherto isolated – sources.Creating Custom Linkers
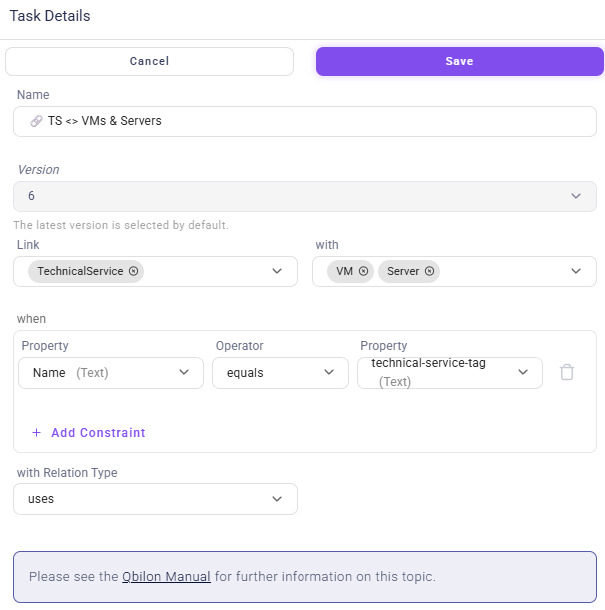
Just follow these steps in order to create such a Custom Linker:- Select the asset types which should be linked: “Link [Asset Type] with [Asset Type]” (e.g., “Owner” with “Service”). Different asset types can be selected via the dropdown menu’s checkboxes.
- Select the asset properties which shall be used for linking these asset types: “when [Property] [Operator] [Property]”, e.g. “when name equals ID”. By clicking on
+ Add Constraint, further constraints can be added, which can be linked withORorAND. Clicking on the delete icon deletes a specific constraint. - The “with row” is used to define the relation type to be created by the Linker:
- enter the name of a new relation type in order to create new relations for it or
- search for an already existing relation type in order to add newly created relations to it.
Custom Linker Example
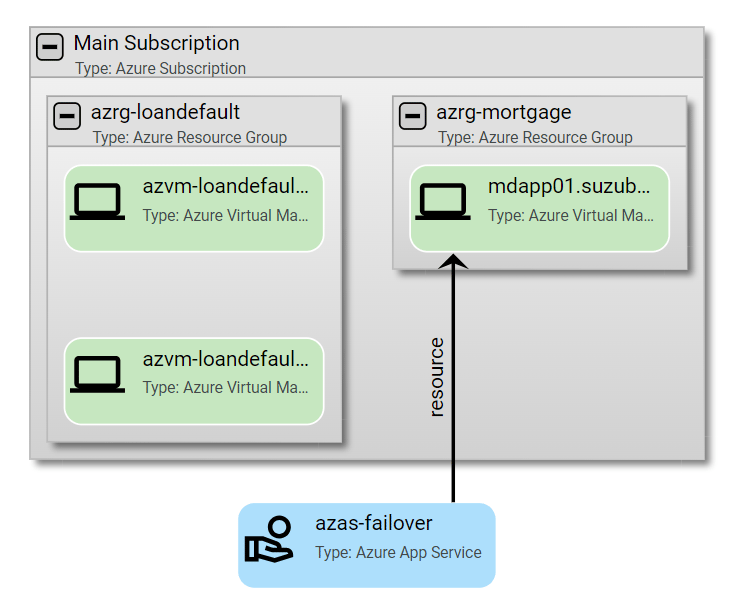
In the following a “before and after example” for creating and running a custom linker is shown. The example has the following configuration: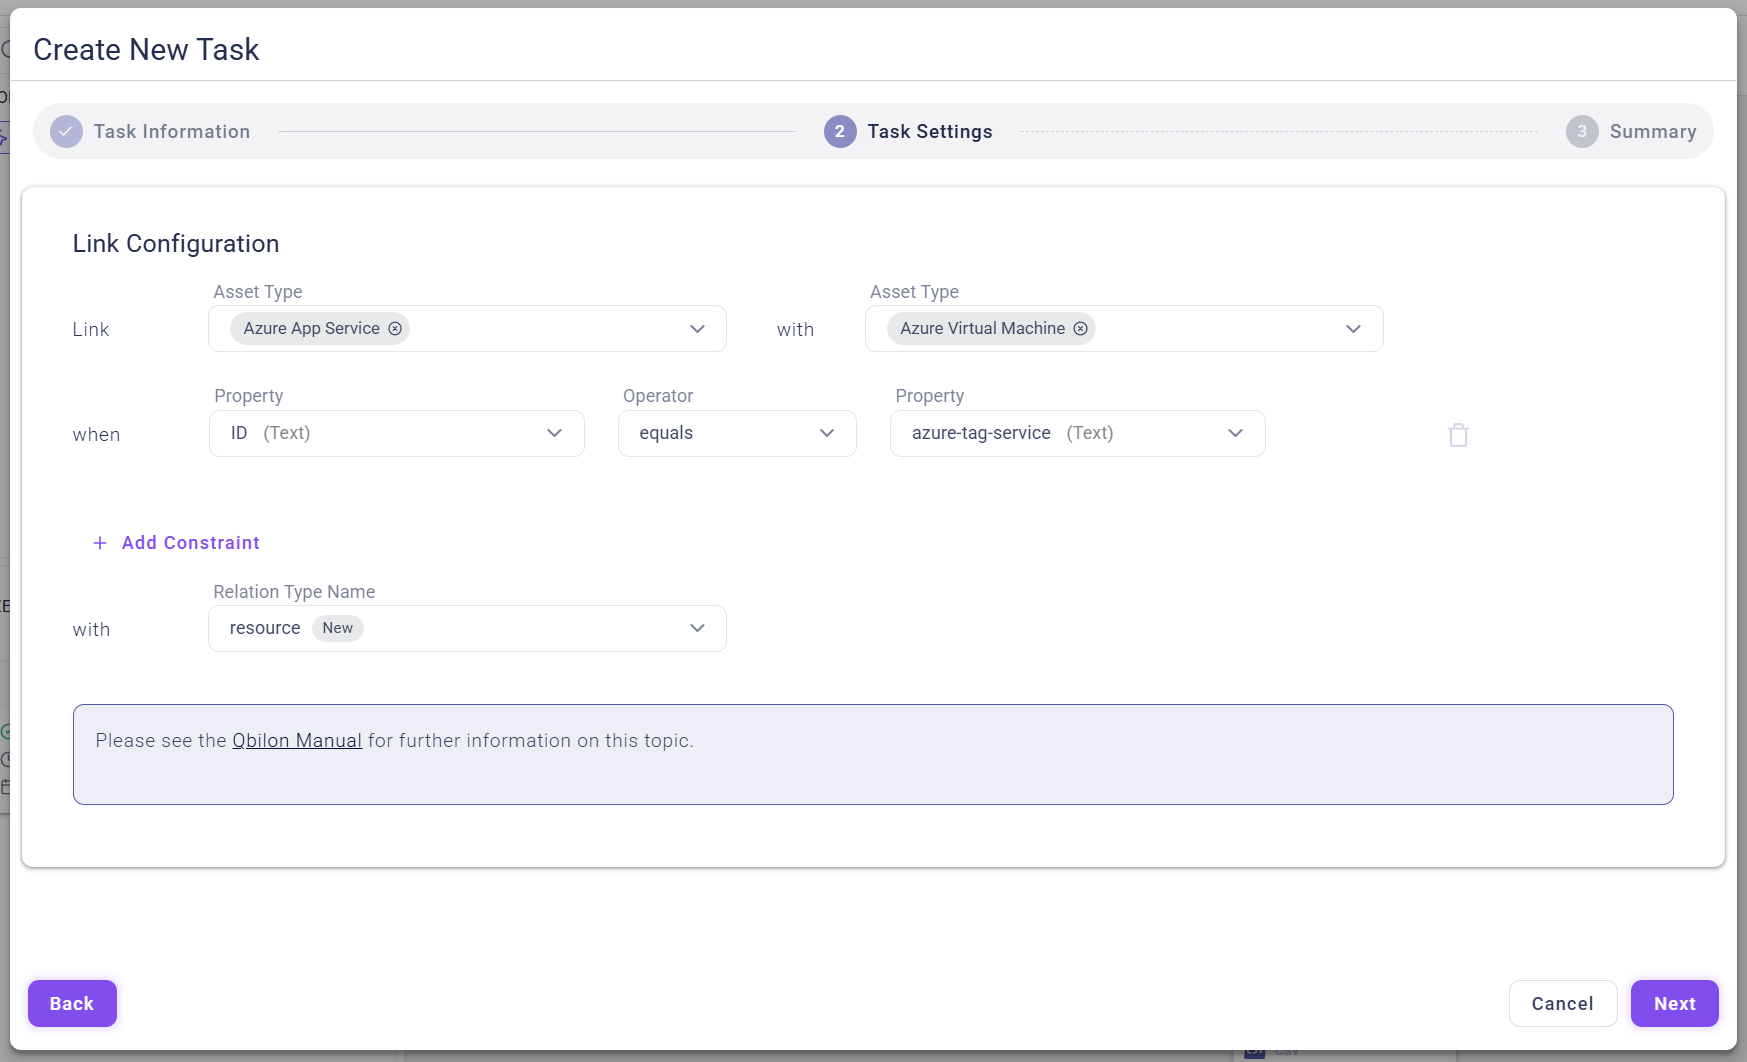
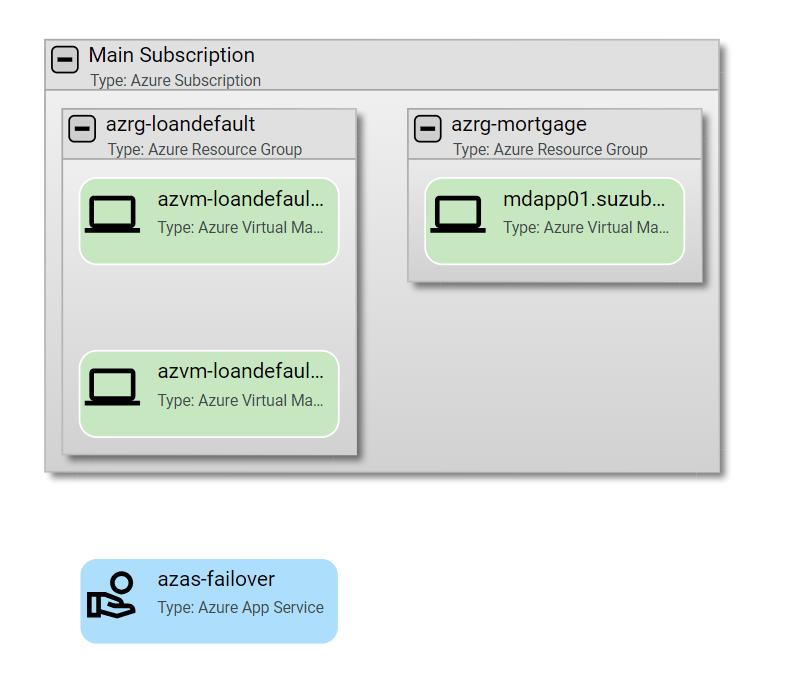
resource between Service azas-failover and the virtual machine mdapp01.suzubank.com: