
Preface
This document introduces Qbilon’s Webhook Triggers feature. It allows you to push arbitrary JSON data to Qbilon, which you can then use in your automations.Creating Webhook Triggers
TheWebhooks section can be found under Automations. Initially, an empty list is shown. To create a first Webhook Trigger, simply click Create Webhook + and enter a custom name.
Standard Triggers
Standard Triggers can be given a name and provide a unique URI that serves as the endpoint to which data can be sent. Whenever data is sent to this endpoint, all associated automations will be triggered immediately (see “Using Webhook Triggers” below). Once you have created a Standard Trigger, it will be displayed in the list.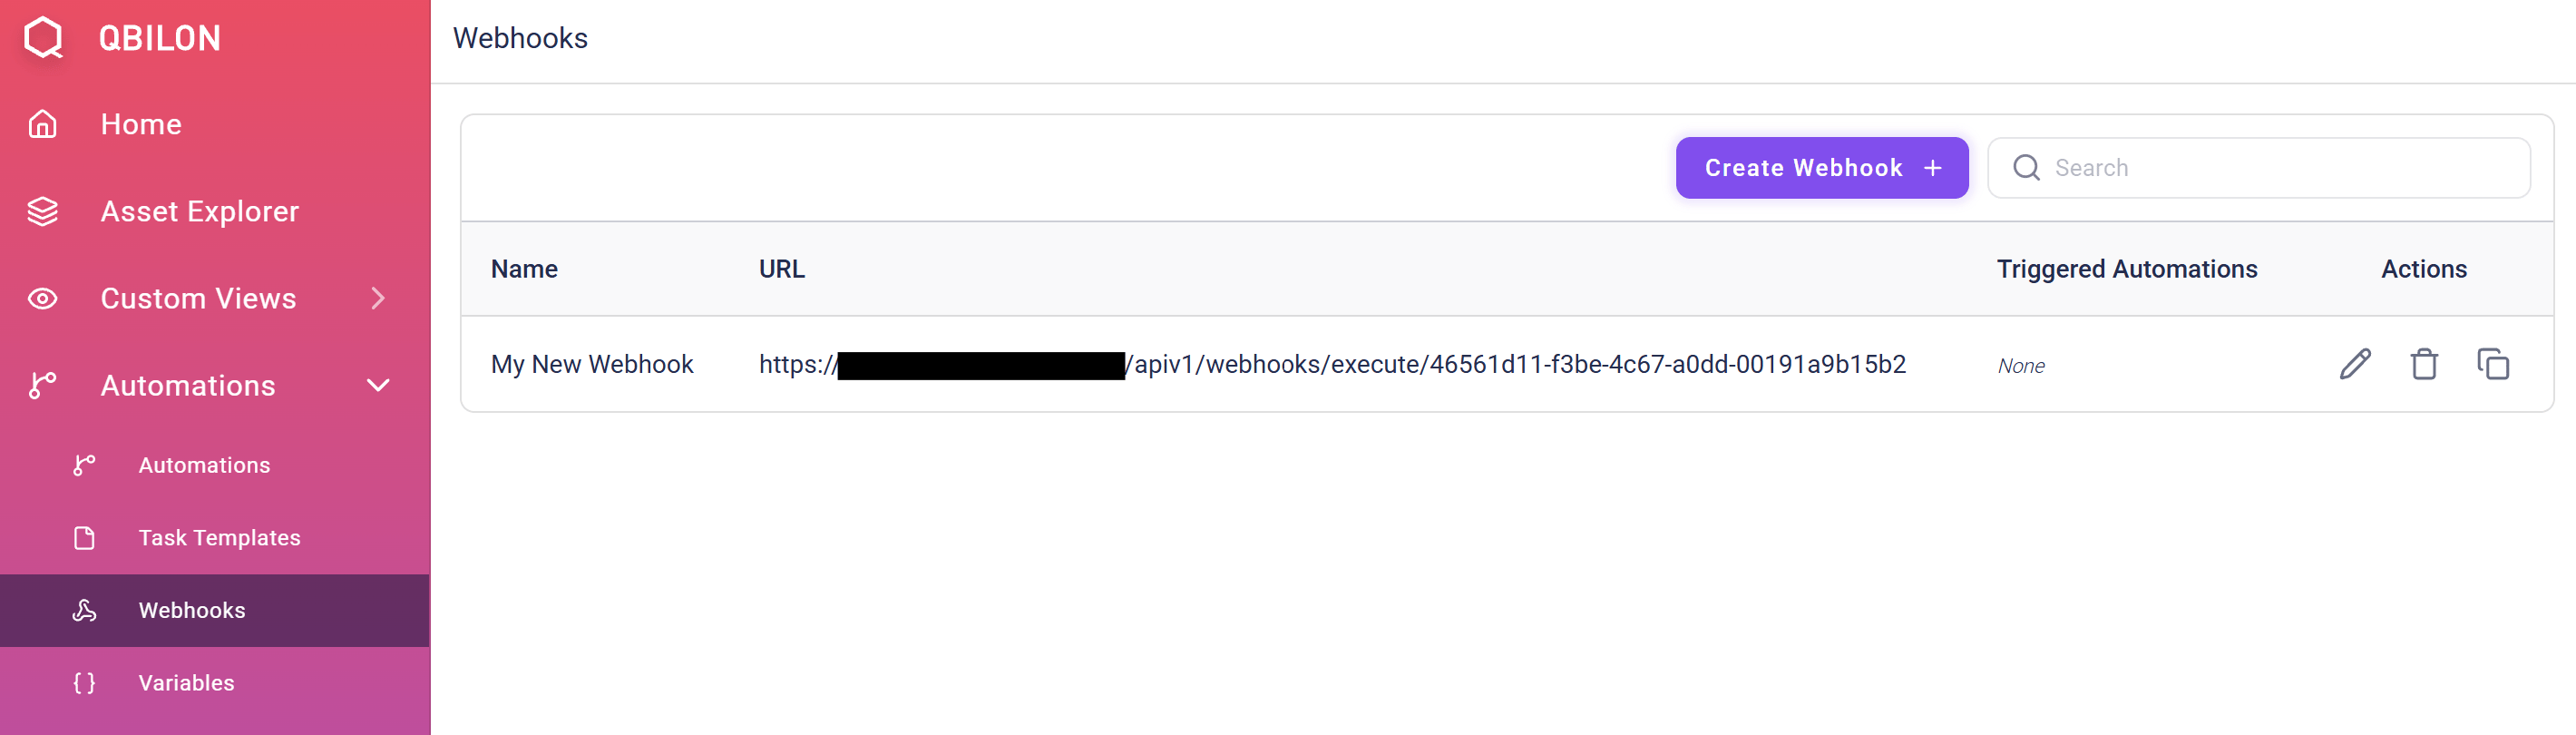
URL column. You can now send data to this URL. While you can change the name of your trigger later by clicking the Edit button (pencil icon), you cannot change the URL. The only thing you can change is the name under which your Webhook Trigger appears in Qbilon.
Using Webhook Triggers
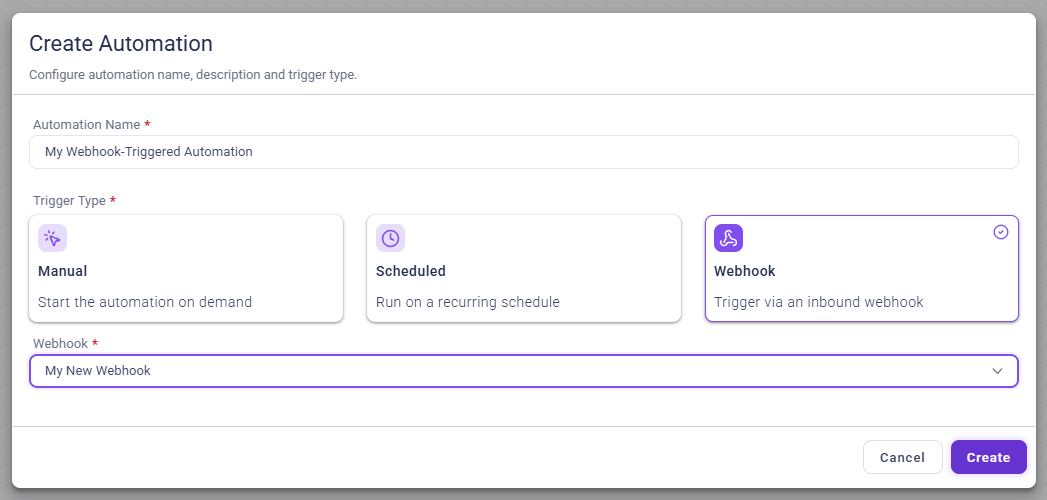
Webhook triggers are designed for use with automations. You can configure a webhook to initiate an automation. This means that whenever an authenticated request is sent to the webhook trigger, your automation will begin. You can then access the data sent via your Custom Tasks within the automation. As explained above, to use a Webhook Trigger, start by creating or editing an automation in theAutomations section.
For existing automations, just click on the “start node” (the circle node at the beginning of the topology visualization) and then on “Edit” in the right side panel. Select Webhook as Trigger Type and choose a webhook from the dropdown list.
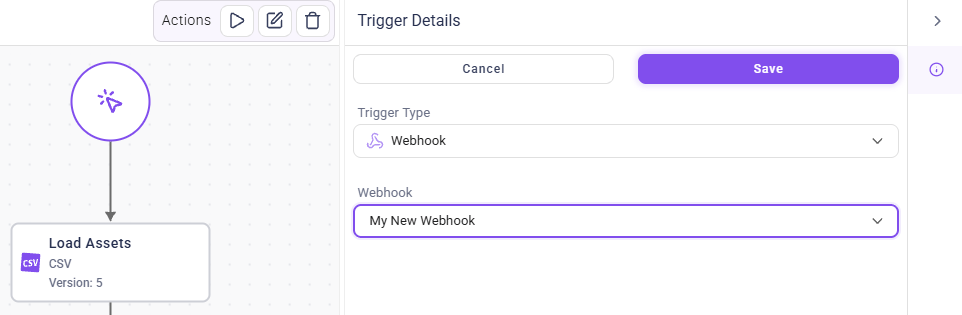
Trigger Type can be selected directly in the appearing dialogue.
Calling Webhook Triggers
Now that you have successfully connected a Webhook Trigger to a automation, you can trigger it from outside of Qbilon. You just need three pieces of information to do so – the Webhook Trigger’s URL, an API key to authenticate against this URL, and your tenant name.- The Webhook Trigger URL is the easiest part as you can simply copy it from the Webhook Trigger you just created, e.g.,
https://my-to.acme.com/webhooks/execute/fea815e2-0fd9-4978-8243-22330235c4a9. - The API Key can be retrieved from the
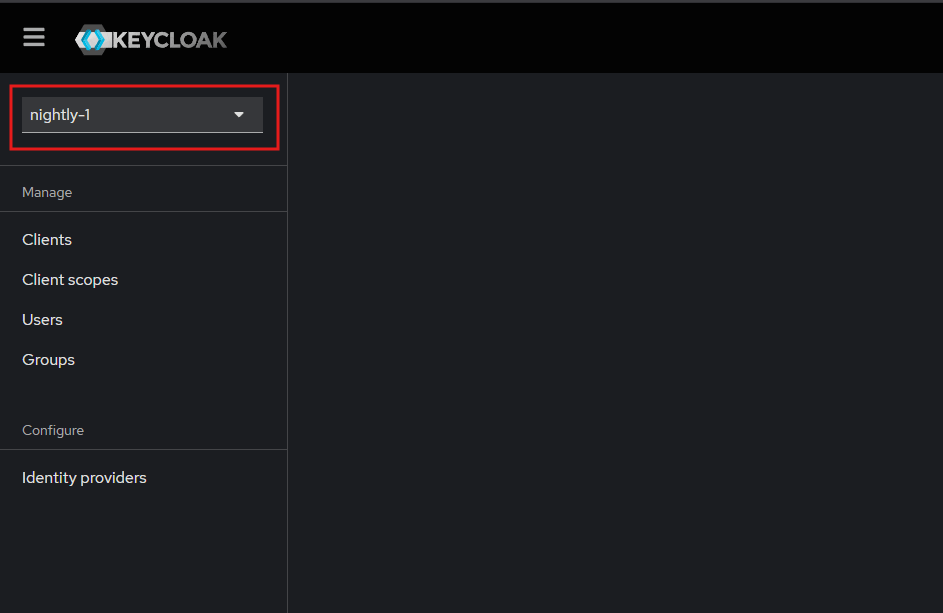
Settingspage in the sectionAPI Keyand looks usually similar to something likeciEyu3lm2BMndGqf1SOmnzLhoLMDMJSU. - The Tenant Name is simply the name visible in your Keycloak instance provided by Qbilon. As an administrator, go to “Settings → User Management → Manage Realm”. Your “Tenant Name” is displayed in the top left corner.
<Webhook Trigger URL>?qbilon-api-key=<API Key> .
Currently, we only accept valid JSON in the body of this POST request. However, if you only want to use the Webhook Trigger for triggering purposes and not for data delivery, you may also send an empty body.
Using Webhook Trigger Data
If you use the Webhook Trigger to both trigger and deliver data to Qbilon, you will probably want to process the data. To do so, it is highly recommended that you create your own Custom Tasks. This allows you to fetch the data delivered by the webhook via a simple call to the data endpoint of your Task Orchestrator. To do this, you will need the following data to identify the correct Webhook Trigger payload to fetch and authenticate against the Task Orchestrator endpoint:- Acquire the host URL of your Task Orchestrator via the environment variable
QB_ORCHESTRATOR_HOST. - Acquire the ID of the workflow/automation in which your task is running via the environment variable
QB_WORKFLOW_ID. - Acquire an authentication token that lets you authenticate against the Task Orchestrator endpoint (see example code below).
- Make a
GETrequest to the following URL:<QB_ORCHESTRATOR_HOST>/webhooks/resource/workflow/<QB_WORKFLOW_ID>. You need to send the authentication token in theAUTHENTICATIONheader of that request.
This code only works within the context of a custom task.
Deleting Webhook Triggers
You may want to delete your webhook triggers at some point, such as when they are no longer in use. To delete a webhook trigger, go to theWebhooks section in Automations and click the trash can icon next to the webhook you want to delete. Please note that webhooks currently in use by an automation cannot be deleted.
Limitations
Currently there is a rate limit in place in order to avoid duplicated automation runs: A webhook may only be called once per minute, otherwise it will return a429 response code. This is a per webhook limit, not per all webhooks.